Tuesday, May 21, 2013

Tying Stone's Pan Candy

Earlier this year, my good friend Jon and I did a fly swap. I sent him a ton of steelhead flies and he sent me some top notch bass and bluegill flies. One of the flies that was in the package was excellent for bluegill and bass. I loved it so much that I modified it, asked him if I could use it as my own fly and he said yes because of the modifications I had made. I asked around to other fly fishing pages on the web and on Facebook to make sure I was not stealing anyone's ideas and when everyone responded with "No" or "Go ahead and use it! Great pattern!", I asked for a name. My friend Jon gave me a list of names that he thought were great and on my Facebook page, everyone agreed that it should be called the Stone's Pan Hammer. However, after me experimenting with other colors, I thought the only appropriate name would be the Stone's Pan Candy. Thus, the fly was born.

Colors from left to right: green, olive, orange, yellow, black, and white.
Here are the instructions on how to tie the Stone's Pan Candy. I will show you how to tie the Pan Candy in the sour apple flavor.

TMC 2488 hook in either size 10 or 12. Note: this is what it has been tested on. It may work on a bigger size so tie as you see fit.

140 Denier thread. Match the appropriate color thread for the color fly i.e. olive colored fly uses olive colored thread, etc.

Some UTC Vinyl "D" Rib. Note: make SURE it is is D rib and NOT round ribbing! It will say round rib instead of vinyl rib.

Once again, ice dub in appropriate color of fly.

Krystal flash in appropriate color of fly.

Natural grizzly hackle.
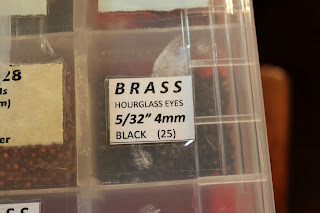
3.0mm bead chain eyes. It took me FOREVER to cut all these up in twos. There are over 200 eyes in there. It's excellent. : )

First, start with a hook in the vise and make a thread wrap down the hook shank to provide for a base for the fly material as well as the eyes.


Just behind the eye of the hook, tie in the bead chain eyes making sure you leave enough room in the front for a whip finish.

Wrap thread down the shank and prepare for the tail. I take a full piece of krystal flash and cut it evenly to make two pieces. This piece is good for two flies. I then take one half and cut them evenly to make 2 pieces. Then I fold it over itself again, cut it to make 4 pieces, and finally fold it over again to make 8 pieces. I then tie that in leaving a tail a tad longer than the hook shank.

Spread back the hackle fibers so they stand up. Tie in the tip of the feather.

Grab your vinyl rib and snip it so it looks like this. If you tie left handed, snip the vinyl rib the other way. Tie it in so the tapered end is covered and take the thread to the eyes.

Wrap the vinyl rib around the shank like you would chenille for a wooly bugger. Make sure you leave a tad bit of room behind the eyes for your ice dub and hackle. Snip it and wrap more thread to cover the tag end.

Wind the hackle so the vein of the hackle is between the grooves of the vinyl rib and wrap until you are behind the eyes. Tie the hackle with a few wraps behind the tag end and then a few in front to secure it. Snip it flush. 

Top view of how it should look after the hackle is snipped.

Finally, add some ice dubbin to your thread and wrap it 2 or 3 times behind the eyes and then make figure 8 wraps around the eyes until you see little to no thread in between wraps of dubbing. Don't make the ice dub look too bulky though. Just enough to cover the thread.


Finally, if there's a tad bit of ice dub on your thread still, do 2 wraps in front of the eyes to clear the thread to whip finish. Whip finish the fly three times or however many you feel is necessary. I always do it three times and wrap the thread 3 times for every whip finish. I feel it is secure without being bulky or hiding the eye of the hook.

Side view of the Pan Candy

Top view of the Pan Candy

Bottom view of the Pan Candy.
These are so fun and so easy to tie and extremely effective. I am debating on adding pink to the arsenal of flies. I may add more colors as long as there's ice dub, rib, and krystal flash to accommodate for the colors needed. Stay tuned! I'm quite proud of this fly as it really does work. Very well. So far, I've landed almost a dozen each of bass and bluegill with this fly and 1 22" carp with a #12 green Pan Candy. Please critique as you see fit. I hope the instructions are clear as I assume everyone doesn't need every single step to be photographed in incredible detail i.e. I left out me wrapping the ice dub behind, around, and in front of the eyes as well as me tying in the vinyl rib and wrapping it. Feel free to ask any questions! Tight lines!

Sunday, May 19, 2013

Sunday Afternoon Gold!

More carp on the fly action this afternoon after a great day at church! I got to my favorite carp spot on the Ottawa, the place I caught my last carp, at Harroun Community Park. As I was walking, I saw a gentleman spincast fishing for the suckers. Apparently he was eating them. I found the break through the trees where I go through to head down to the river and smelled something dead. Apparently somebody threw a carp on the bank. It was dead but it appeared to be freshly dead. I think they caught it and left it for dead, sadly. Was pretty upset about it but what can one do....

I fished for about 2 hours with a few interruptions. Saw plenty of suckers, about 8 or 10 carp (males swimming beside females to mate), and a few pike hugging the bottom where it was cooler water. Overall it was pretty slow but I got to test out my new Eagle Claw Featherlight that I converted into a switch rod! It was excellent as I was using a #12 fly and was able to whip that thing across the river with ease with just a flick of the handle. It really performed well with the two handles. It was really slow going. Started out with a #12 carp hybrid fly, snagged a carp by the tail or fin or something and didn't have the drag set low enough so I lost that 15 seconds into the fight.

It was really a game of chance here and I was losing. I kept tossing the fly to cruising carp, both male and female, whether they were loners or a pack of males following a female. In the end, I hooked into a nice female with a baby leech fly.

Once again, I apologize as I am unable to feature my Youtube videos directly into the blog post for some reason. Click here to see the underwater footage of the carp. It's pretty cool if I say so myself. : )

Edit: went back at 6 and fished for another hour and a half. Caught a 22" loner on an original fly of mine, the Pan Candy! Will be posting how to tie in the next few days. Click here to watch it! I even gave the carp a kiss. How sweet of me! : D

This female was 1/4" shy of 24"! Great fight especially on glass! Love this rod!

Kisses anyone?

My new girlfriend!

Friday, May 17, 2013

Fast Sinking Leech Pattern

This is a very classic pattern and everyone knows how to tie a wooly bugger. This was requested by a gentlemen on my Facebook page Stone's Flies. He asked me what I used to catch the carp and I told him I would give him a step by step process of how I tied the Deep Leech. I also tie this in olive, brown, and white the same way. Just as effective but for other fish as well.

First materials are as follows:


I use a size 6 2xl as I feel it's a good size. You can use something smaller but you need to use different material in some cases to match the hook size.

140 denier black thread. Smaller sizes I would use 70 but 140 is excellent as it's in the middle and can be used for even down to a size 10 or 12 in some cases.

Along with the dumbbell eyes, this gives it extra weight that it needs to sink faster.

Best size for the dumbbell eyes. I would go to a 3.5mm for a size 10 hook but you can stay at a 4mm for a size 10 if you want to make it sink faster.


Always get medium chenille. Looks better in the water.

Any marabou will do just as long as it's black. I just choose Cabela's brand since it's cheap.

Again, cheap Cabela's brand saddle hackle. As long as it's black, you're good. Wait....that came out wrong.

Put the hook in the vise. Duh.

Start by wrapping the medium copper wire around the hook shank. It's very important that you leave enough room for the dumbbell eyes behind the eye on the shank and leave some room at the end before the bend to accommodate for the marabou being tied in just as you would any other wooly bugger.

Secure the copper wire with thread.

Add the eyes to the top of the hook so the hook will ride hook up. Make sure you leave a bit of a gap just behind the eye to whip finish.

Tie in the marabou tying the marabou all the way up to the dumbbell eyes. I do this to give the fly more body.

Tie in the saddle hackle tip end first and spreading the fibers back.

Set the hackle aside and then strip a bit off the end of your chenille and tie that in next.

Wrap the chenille around the shank and up to the eyes. Tie it off and snip the remaining chenille off.

Wrap the hackle around the chenille making a few extra wraps at the head to give it more hackle fibers in the front. I've found it makes the body look better in the water. Tie it in, snip the remaining hackle off, and then whip finish right behind the eye of the hook and in front of the dumbbell eyes.

Simple as that. Classic pattern. Simple and super effective. KISS: keep it simple stupid. : ) Modify weights and experiment with weight as needed in streams and rivers.

Thursday, May 16, 2013

Harroun Community Park Ottawa River Carp on the Fly!

Man! That's a title! : ) Finally done with school for a bit and just got back from vacation in Georgia. I now have a bit of free time to do what I want to I went fly fishing for carp yesterday. I scoped the area out last week before I left so I knew what I needed to do in order to catch carp.

The area where I went is part of the Ottawa River. It's really cool because the area is not very far from my house and it's smack dab in the middle of everything. Flower Hospital, the hospital where I used to work, is just a short hike to where I was fishing which is incredible.

I was wet wading as the water was not as cold as I was expecting even though the deeper parts were just above my waist. I really took my time that day seeing what was in the pool. It was filled with carp and suckers. I tied on a heavy weighted leech pattern and was almost nymphing with it. A giant came up and slurped it in as it was cruising just under the surface as the fly was sinking. I set the hook and it ran. I'm glad I had my 8wt because I was considering using my7'6" 4wt but it would have been almost impossible to bring this carp in.


I apologize as Blogger is being dumb and won't let me directly insert a Youtube video for some reason. Click here to watch the video of the fight and release on Youtube. Skip to 8:40 to see the fish up close and personal and then the release. I lowered the resolution to 720p instead of 940p as it gave me 60fps which is super nice. 

After a while, I hooked into another one. This fish gave me a run for my money. I didn't land it though but it still was fun to see my line zip out of the reel on a higher drag set. Watch it here.

Overall it was a great day. I now know that there are a lot of carp close to home. You just have to look in the places that you'd least expect them and do your homework before hand! That's what fishing is all about. 

One thing I've learned about river carp is that once you catch one out of one hole, you can't catch another because they then know that they're being hunted. I guess I'll have to wait for another day to catch another big one.